Pneumatic Pipe Fittings: Selection and Installation
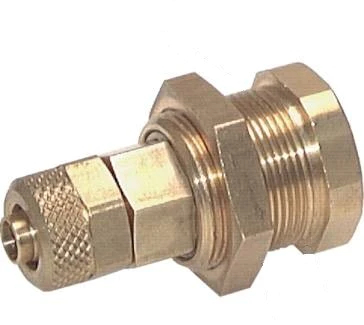
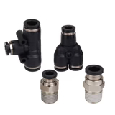
Figure 1: A standard air pipe fitting.
Pneumatic pipe fittings securely connect air and gas pipes to other components in the pneumatic system. This article explores how to select a pneumatic pipe fitting and install it to ensure proper operation.
Pneumatics glossarySelecting a pneumatic pipe fitting
There are many different types of pneumatic pipe fittings to choose from. Despite the variety, when selecting a fitting, there are common attributes to pay attention to. This ensures that the correct fitting can be selected for the proper application. Read our article on the different types of pneumatic fittings to learn more.
-
Fitting type
- Standard air couplings: These couplings have two parts: the socket with internal threading and the plug or nipple with external threading. These couplings used to connect air hoses to air tools and maintain pressure during disconnection.
- Push-to-connect fittings: Push-to-connect fittings, also known as push-in fittings, have an internal gripping mechanism that securely holds a hose or tube once inserted. These fittings enable rapid connections without requiring additional tools.
- Push-on fittings: Push-on fittings, or push-fit fittings, connect plastic or copper tubes by utilizing stainless steel teeth within the fitting. These teeth dig into the tube upon locking, enabling a quick and strong connection.
- Safety couplings: Safety couplings safely interrupt air flow when disconnected, preventing whip effects that can damage the air tool and endanger the user. These couplings comply with safety standards ISO 4414 and EN 983, ensuring optimal user safety during their application.
- Large air couplings: Large air couplings have diameters ranging from 10 to 19 mm and are for high-flow applications. These couplings are used in heavy machinery, construction equipment, and industrial settings.
- Color coded air couplings: Color coded air couplings have colored labels. Each different color has a different shaped connection. Couplings of different colors are incompatible, ensuring that only matching plugs and sockets can be connected. This system helps prevent accidents during operation, particularly when dealing with multiple gas lines that must not mix.
- Air coupling manifolds and multilinks: Air coupling manifolds and multilinks allow multiple air hoses to connect to a single air supply. They come in various designs and feature automatic shut offs so unused ports do not leak compressed air.
- Claw couplings: Claw couplings have two claws on each side that connect by pushing and turning the two sides of the coupling together. They are used in harsh environments with larger air flows and hoses.
- Compression fitting: Compression fittings have a nut and a ring that slide onto the pipe. By tightening the compression nut to the fitting's body, a secure connection is created. These fittings are highly convenient for quick and effortless connections.
-
Environment: The application's environment plays an important role in selecting a fitting.
- Temperature: Fittings have minimum and maximum operating temperatures. Choose the fitting's temperature rating carefully to prevent damage to the fitting.
- Space: Different fittings have different sizes. Ensure the selected fitting will fit where it should be installed.
- Contaminants: Different contaminants in the system can negatively affect the fitting (e.g., rust, oil, and metal shavings). If there is a chance of contamination, look into installing an FRL unit upstream.
- Air pressure: As with temperature, pneumatic fittings are rated to work within specific pressure ranges. A fitting's pressure rating corresponds to the optimal working conditions of an application. If the application's pressure exceeds the fitting's rating, the fitting can leak or break.
- Approvals: Some applications (e.g., food and beverage) require all components in the system to adhere to specific safety standards.
-
Material: Pneumatic fittings come in a variety of materials.
- Stainless steel: Stainless steel fittings are more expensive but have excellent corrosion resistance properties.
- Plastic: Plastic fittings cannot rust, so they are suitable for many different environments. They are suitable for low-temperature and pressure applications.
- Brass: Brass is a good choice between stainless steel and plastic. It has good corrosion resistance and is less expensive than stainless steel.
- Aluminum: Aluminum fittings are cost-effective and suitable for low-pressure and temperature applications.
- Connection size: Ensure the fitting connection ports are correclty sized to connect to the system. For example, for threaded fittings, ensure you have the correct thread type between metric, NPT, and BSP threads.
Installing a pneumatic pipe fitting
It is important to follow correct procedures when installing a pneumatic fitting in order to prevent premature failure or damage to the fitting. Specific fitting types have specific installation instructions; it's important to refer to the fitting's installation instructions. However, the installation instructions will follow the following general process.
- Tools: Prepare the pipe fitting, the pipe, a cutting tool, a deburring tool, and thread sealant or Teflon tape if necessary.
- Turn off pressure: Make sure the pneumatic system is turned off, and all pressure is removed.
- Measure and cut the pipe: Measure the length of pipe necessary for the application. Use a cutting tool, such as a copper or PVC pipe cutter, to make a square cut. Do not crush or deform the pipe because this can damage the fitting.
- Deburr the pipe: Use the deburring tool to smoothen and remove sharp edges from the pipe's cut end. Any sharp edges can damage the fitting.
- Tape or sealant (if necessary): If the specific fitting's installation instructions state that thread tape or sealant is necessary, apply the necessary component to the fitting's male threads.
- Put the pipe in the fitting: If the fitting is push-to-connect, also known as push-fit, push the pipe into the fitting until it bottoms out. If the fitting is different, such as or barbed, tighten a nut or slide a clamp over the pipe before inserting it into the fitting.
- Inspect: Check that the pipe is fully inserted into the fitting and there are no misalignments or gaps. Gently pull the pipe to ensure it's securely in place.
- Test: Turn the pneumatic system back on and gradually increase the pressure. Inspect the fitting for any leaks or other issues. If there are issues, turn the system off, relieve the pressure, and reinstall the fitting.